I know you all thought I had forgotten about the New Home Giveaway Q&A but you thought wrong didn’t you? 😉 I actually have been working on this post for the last few months and trying to put together a good way to show you the answer to some of the questions you had. If there is anything I hate more than a Photography lesson without pictures, it’s a Photography lesson that wasn’t well thought out. So please forgive the lateness in this post and I do hope you will find some helpful tips on here!
Q: I have a point and shoot camera. I never shoot on the automatic setting. I have a real hard time photographing red, black and fuschia. If it’s yarn, it tends to look like a blob. With blacks, the pattern or detail doesn’t show up unless I make the color more gray in post processing. I don’t have photoshop and just use flickr and Iphoto. Any tips for me?
A: Reds and fuschias are insanely difficult to photograph… The number one thing to do is post processing, which it seems like you’re doing. Number two, please photograph them in RAW and not in JPEG formats (if your camera allows this) so you can play around with the picture in the post-processing stage without losing quality. When photographing reds and fuschias in particular I would for sure suggest you do a white balance either on your camera or afterward during post-processing – your choice, whatever is easiest for you. Also, when photographing yarn, make sure that you’re using a good color in the background, such as a light gray, so you can see the red best. In post-processing I would suggest you desaturate the image a bit. This will bring the red closer to a true color as red is notoriously oversaturated in pictures, particularly from point and shoot cameras. In addition, remember to lower the brightness a bit during post-processing, as needed, to achieve the right color balance.
Blacks and very dark colors are also very difficult to photograph and I know more about that from photographing black suits next to a white wedding dress… that can be so difficult to do if you don’t have the right settings! For blacks, especially using a point and shoot, the number one thing is to have good lighting. You need to be able to SEE the details in the black very well for it to show up in pictures. Get a few spotlights (basically just buy a good natural-light bulb) and set them up around the area where you will be photographing AND do it during the day. Don’t wait until the night time to do it. Make sure to white balance, as for the reds, and play around with the black level of the picture during post-processing as well. If you feel like the black is too bright or too dark it’s easy to adjust that by changing the Dark/Black levels during post-processing. Also, changing the clarity of your picture (post-process AND use the Macro button on your camera for those close up shots) will help to define those edges more, which can be important with black. The key to using a point and shoot for taking pictures of knitwear is to not be afraid to fix things during post-processing. You CAN take decent pictures with your point and shoot camera, but you can’t be afraid of messing around with the controls and of editing the picture as needed. Which is why I would recommend shooting in RAW just for these kinds of pictures… so you have a bigger amount of control to mess around with the shots after you’re done with them!
Q: What do you recommend as a bare-bones set up for photography of FOs?
A: Barebones? Well, I would say for sure a good camera. One that at the very least has a macro setting, a white balance option and a way for you to shoot in RAW. And if you’re shooting in RAW then definitely a post-processing software. Also, a tripod and a remote control for you to be able to work your camera AND model your knits. Or find someone to take the pictures for you! 😉
Q: What are some tips you can share about taking photos of yarn to add to stash pages on Ravelry?
A: Number one tip: Make sure it’s in focus! The huge amount of stash pictures I’ve seen out of focus on Ravelry is just insane to me. I don’t understand it… why add a picture if you can’t even see what it is of? But I guess that’s just a pet peeve of mine… to be more serious about it, there are a number of things that you can do. First off, calibrate your monitor! And don’t just use the dinky calibration that comes with you monitor get a SOFTWARE that allows you to color calibrate your monitor better. There are free ones out on the web, so there are no excuses for a poorly calibrated monitor! Secondly, post-processing of your images is SO important. Whether or not you have a point and shoot camera, post processing is your friend. In particular when dealing with getting colors just right! And I promise you this is NOT a digital era thing… back in the film days of cameras professional photographers (and your local one-hour processing places) were ALL tweaking color and exposure for you so you’d get the picture you wanted. So it is just common sense that you would do the same thing when shooting digital… the picture straight out of the camera can oftentimes be decent (even good!) but there is nothing wrong with tweaking it to get it just perfect! So how do we do that?
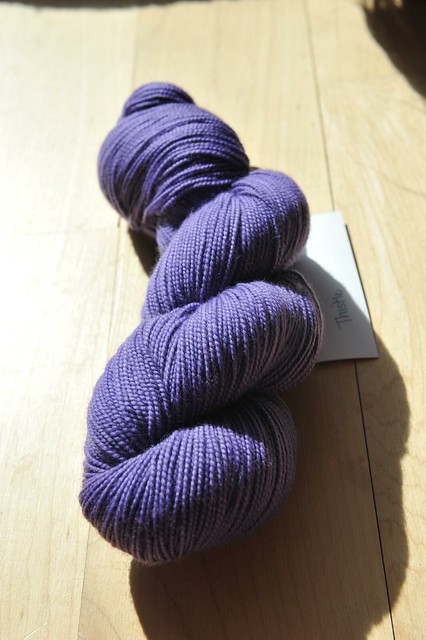
First and foremost: decide where to take your picture. Should it be on a sunny space or a dark one? In a white background? A light one? A gray one? These are all things you have to think about. Backgrounds… they are important! They show off the yarn either in a good way or a bad way. For example, here is a skein of Hermosa Fiber Co. Sock yarn that I took in direct sunlight (more on that below) using the automatic setting on my camera (although the picture quality will be better than a point and shoot as this is my professional camera, I did zero post processing of it and I also didn’t touch white balance or anything else on the camera for this shot):
As you can see the picture is fine… it shows the yarn and it’s in focus (very important) but the color is a bit off and the background is really not doing it justice, you know? Here is the yarn on a gray background and still in the sunlight:
That’s better, but still I’m not sure how much I like the way it looks there. The color is off, for one, but also the shadow looks a bit ridiculous and the gray background doesn’t seem to add anything to the color of the yarn either. So what to do? A light background perhaps?
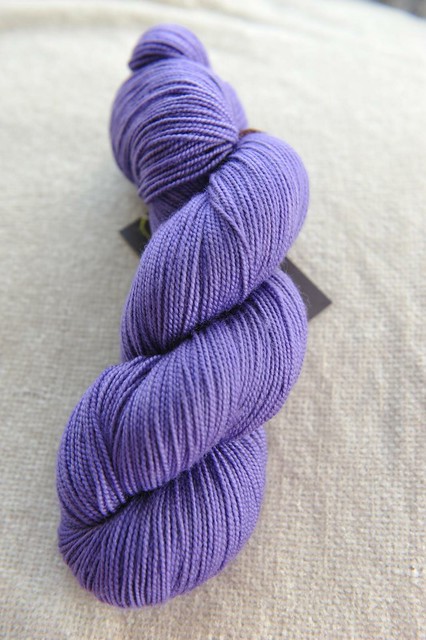
Do you all see how much more that skein of yarn is already popping out of the picture at you? It’s such a big difference just changing the background of the picture… so for every color play around and try different color backgrounds… see what works best for you!
Now for the lighting… I would never ever shoot yarn out in direct sunlight (well, other than the ones I did to show you above). Why? It totally blows out the color, in particular if you won’t be doing any post-processing or editing of the picture (more on that below). Look at the pictures above. Do you see that dreadful shadow around the skein? It just does not look good. And the color is a bit oversaturated in every picture up there (less so in the light background… see why background colors are so important?). They are all acceptable shots but no where near what I would call good. So let’s say NO PICTURES IN DIRECT SUNLIGHT… okay, so let’s take a picture of this same skein in the shade but still during a BRIGHT day and we’ll skip the wood background as it wasn’t working for us. So let’s see it using the light background and the gray… and let’s smooth out that background while we’re at it, shall we?
The difference is like night and day! The second shots are much clearer, pretty to look at and show off the yarn best… and the background looks great! Just thinking about lighting and backgrounds can already make your pictures tons better! So now let’s get down to some nitty gritty techs:
1. Make sure your camera is set on Macro mode. It’s usually a flower/tulip looking setting. This allows you to take pictures of things at close distance. 2. White balance your camera. Don’t know how to do it? Figure it out! Look at the manual. 9 times out of 10 your camera allows you to do your own white balance. If it doesn’t, seriously consider getting a new one! 3. Shoot in RAW mode. This will allow you to post-process your images on your computer. This will also require that you have software that can process RAW pictures, but that’s not terribly expensive nowadays, especially if you get the Lite version of these softwares. 4. Learn how to play around with post-processing software. Find out what you can do to make the image look better. What should you tweak? Brightness, contrast, saturation? These are all things that you can change to make the perfect picture. Now that we know that a shady spot on a BRIGHT day is best, let’s see what we can do with post-processing of images! Here, side by side, you can see the JPEG image (without any post-processing) and then the RAW image which I did post-process:
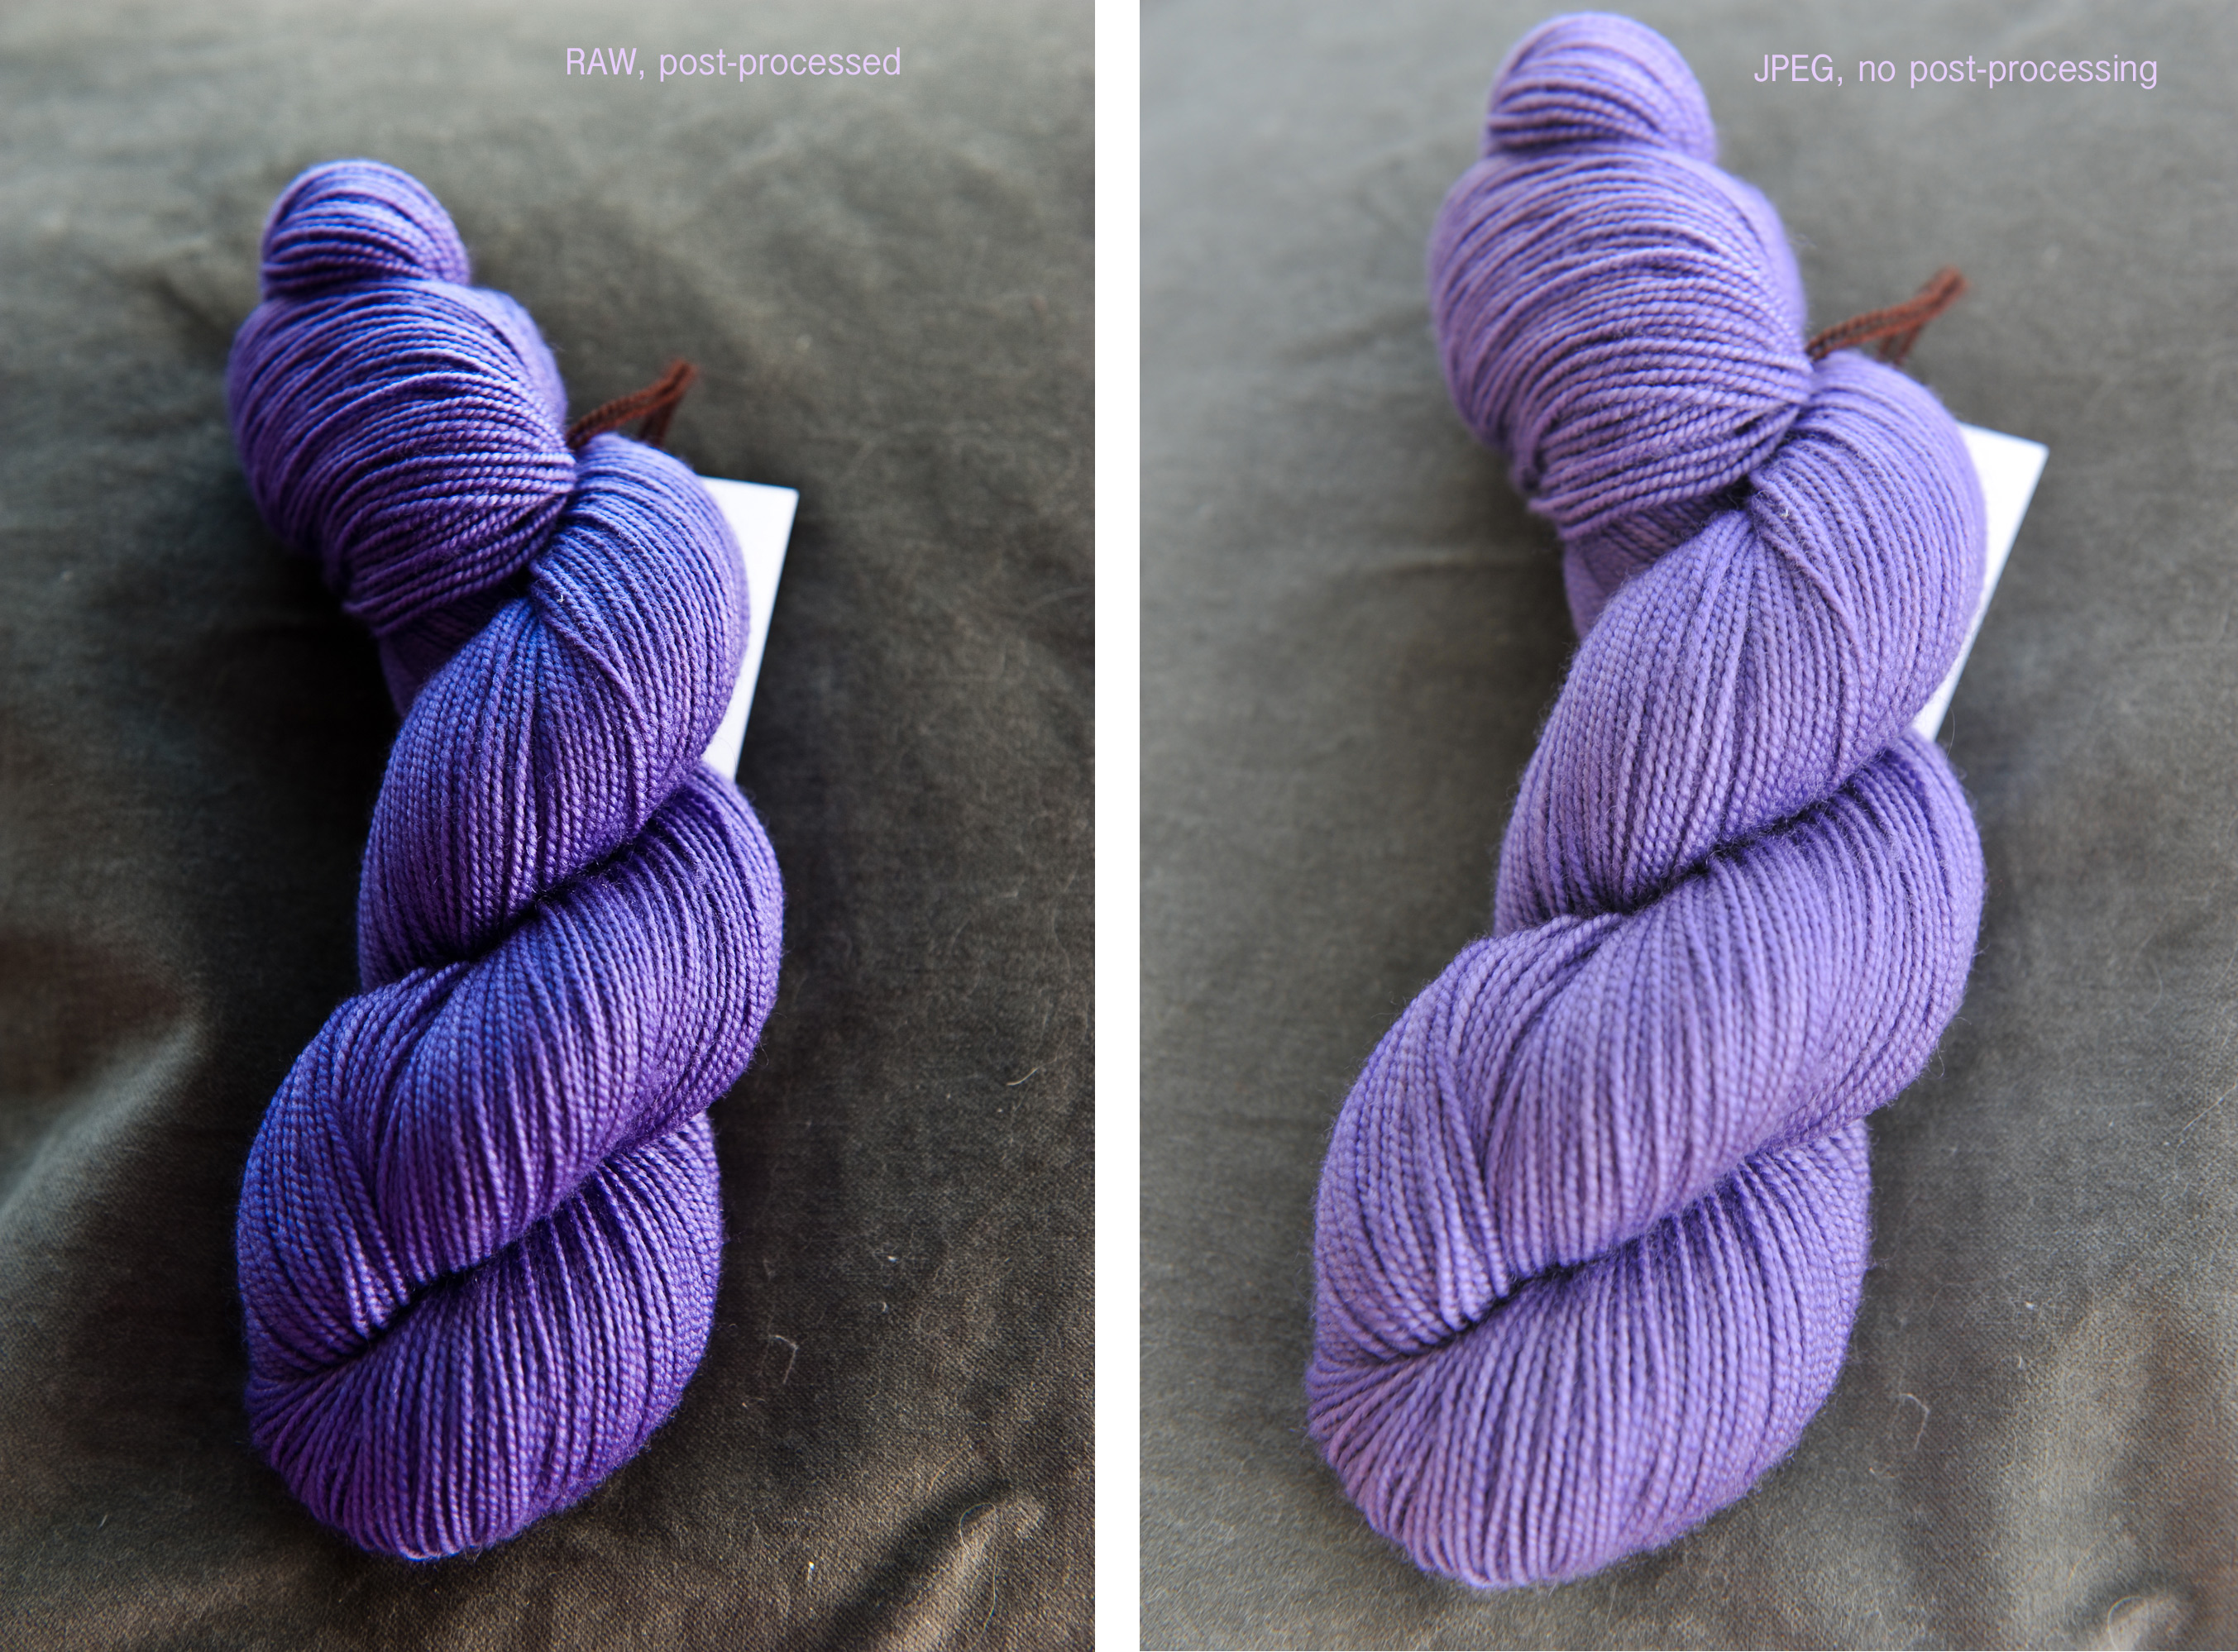
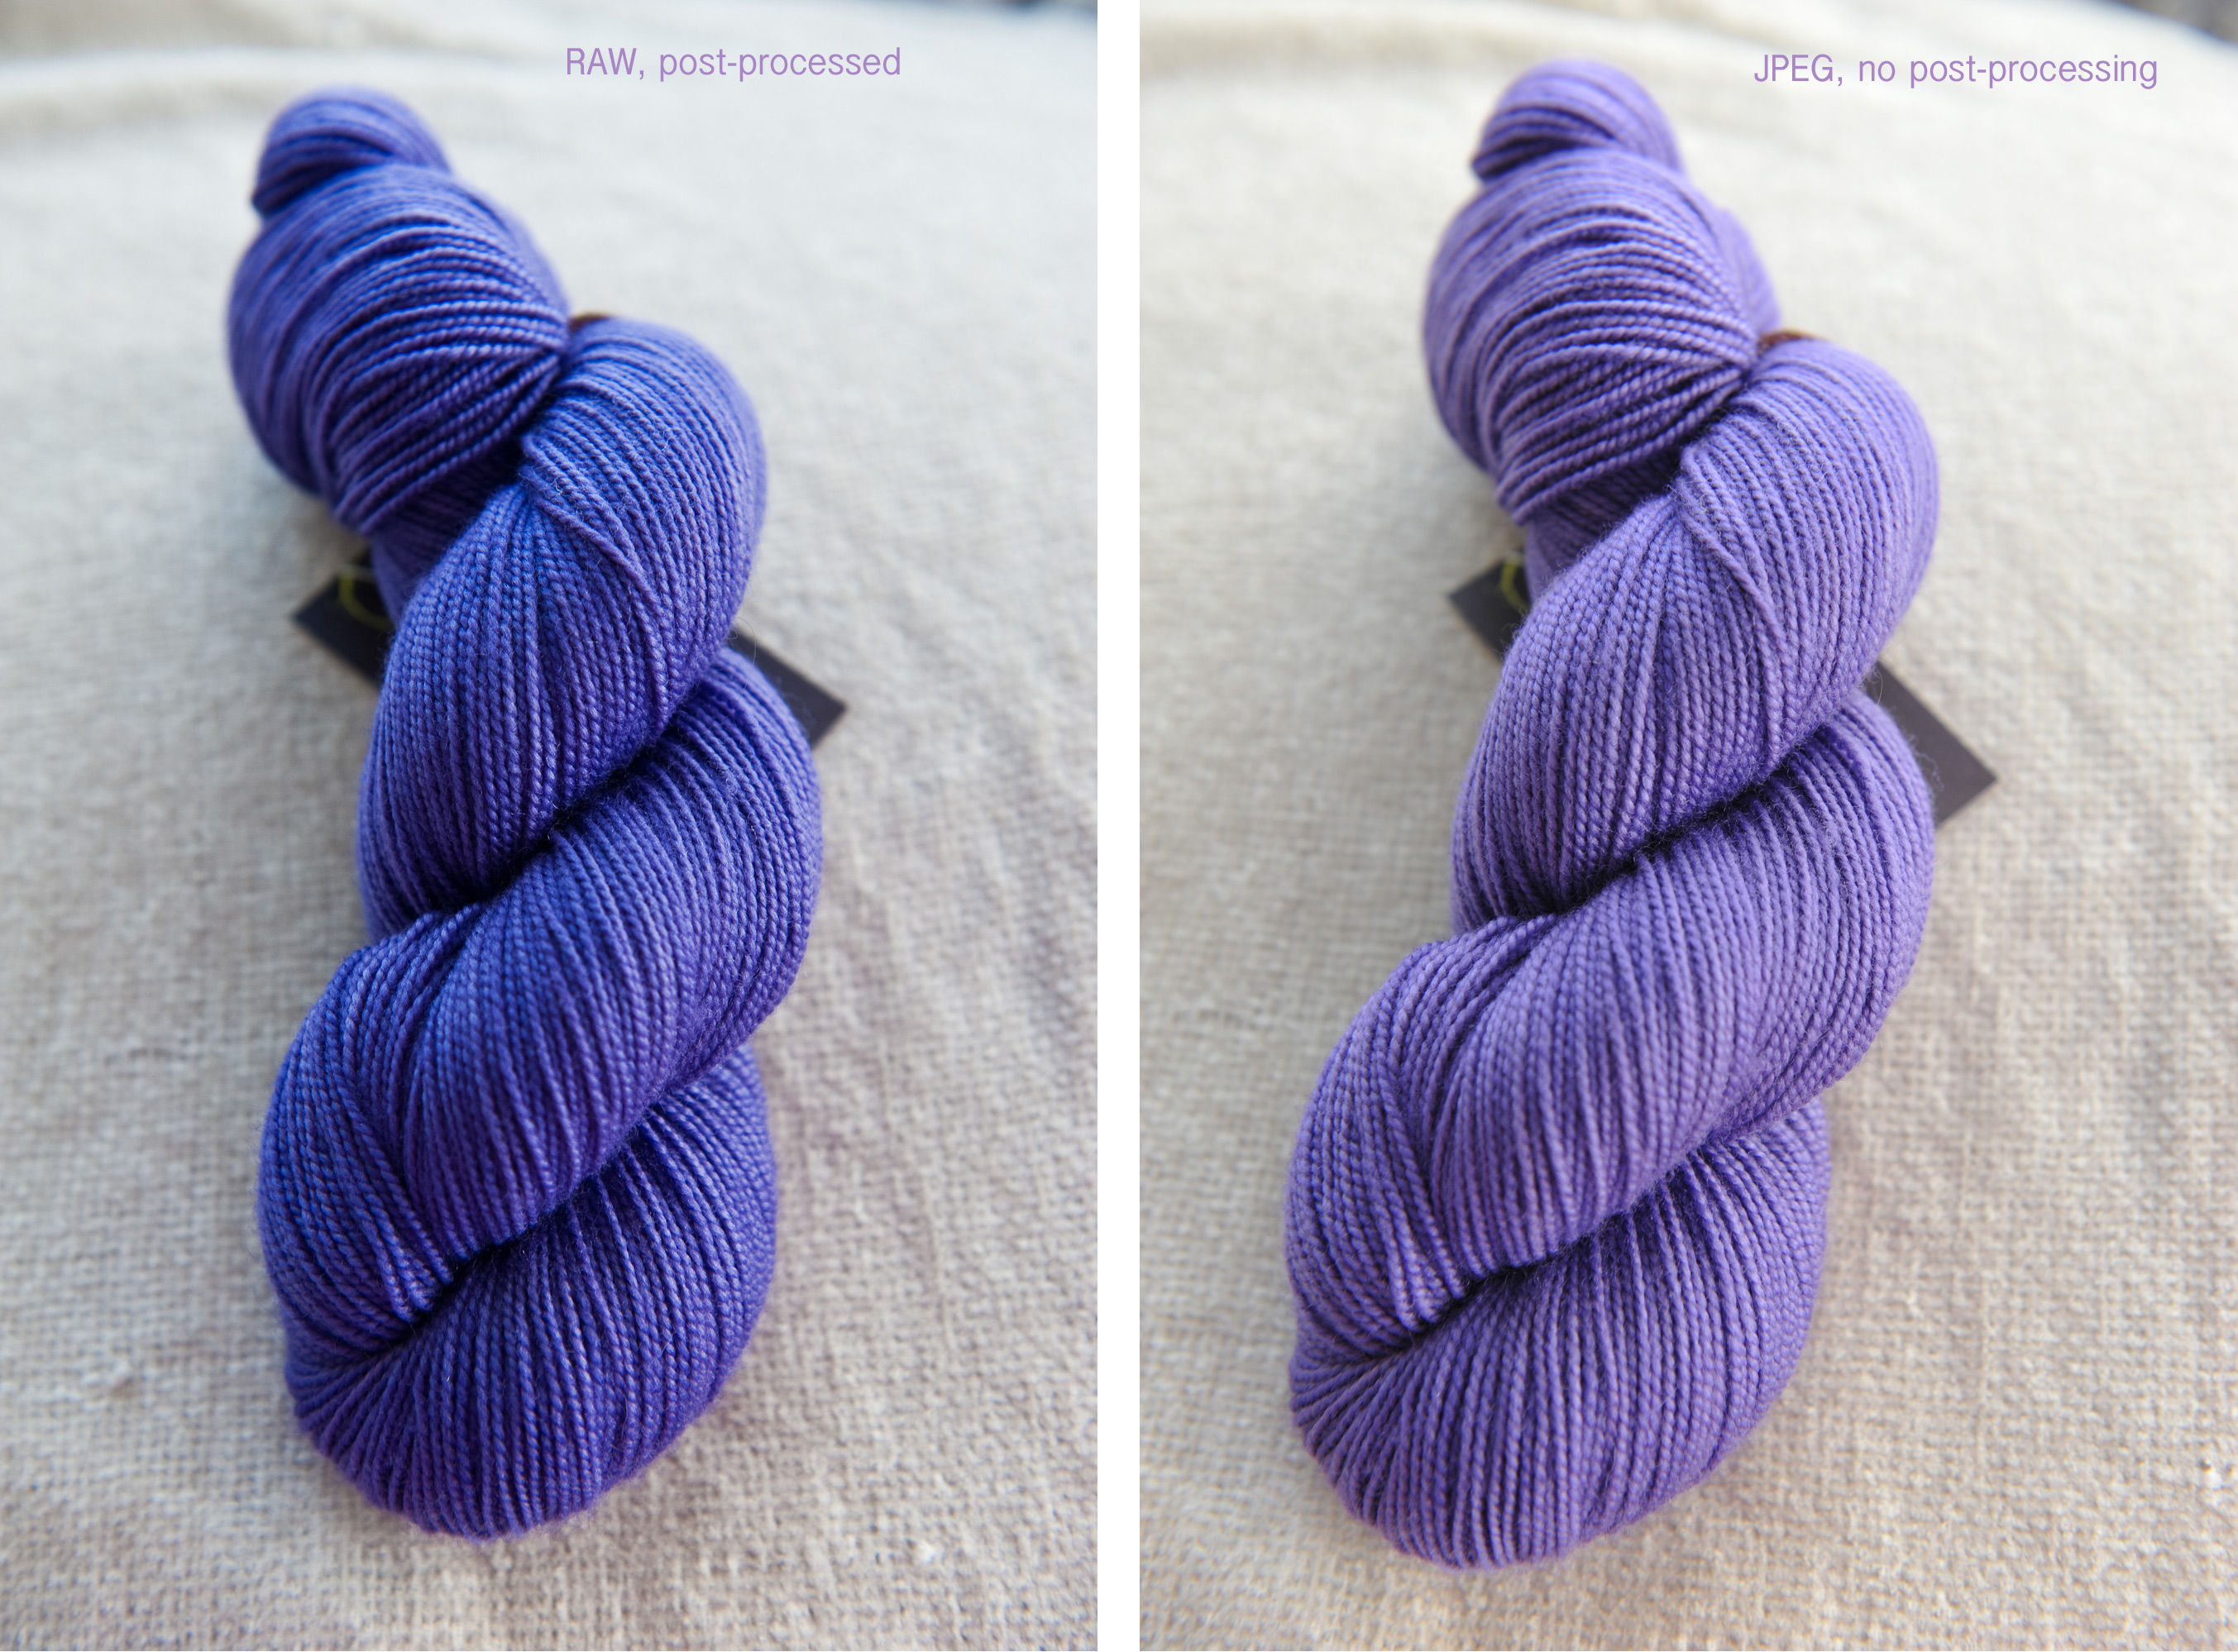
I can tell you that on my color calibrated monitor the color is spot on in the post-processed image. Plus, the skein looks nice and beautiful in those backgrounds (and to be honest, I prefer the gray background in this case… I think it shows off the color more) and you have something nice and pretty to show on your Ravelry page! The other thing that I would say that should be done is to take shots from cool/interesting angles. The more different the picture the cooler the shot a lot of times (not every time, but most times!) so don’t be afraid to do something fun and different. For example, here is a skein from the normal top view shot:
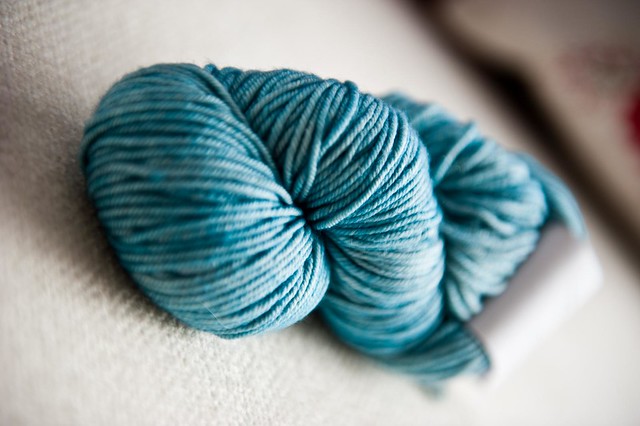
Heh, it’s pretty but we can definitely make that cooler! Using your MACRO setting, try getting close to the skein, on its level, and to the side or from an angle! See how much cooler those shots become?
I hope that helps you think about photographing yarn a bit more and in different ways! I can’t wait to see what you all come up with. 🙂
Q: What’s your favorite subject to shoot? Yarn that sits still, dogs that don’t, weddings, babies??
A: My favorite subject… hmmm… that’s a tough one because I do love shooting everything I do. It’s a way for me to express how I see things in the world to others, and that’s really important to me – whether it is through my knitting, someone’s wedding, a vacation or a new life! 🙂 But if I had to choose one absolute favorite I would have to pick dogs. They are so much fun to shoot, don’t complain about how they look in the picture afterwards and are just so adorable! It’s a hard one to call, but I think that would have to be it.
Q: How do you get the patterns to show up so well when you photograph your projects?
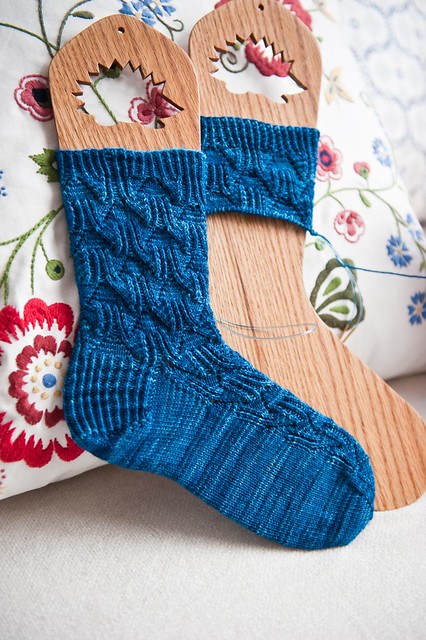
A: In order to photograph projects well, follow the tips I gave for photographing yarn and most particularly photographing on MACRO mode when shooting for close ups and also playing with your angles! Here is a WIP of a Mona sock I shot yesterday… here is the shot I usually see people do:
Is it a nice shot? Well, yes, there’s nothing wrong with it… but it would be much cooler if you do it from the side or from the bottom or both! Like this:
And if you want to get closer still, this also looks very cool.
Think outside the box and take lots of pictures! In this digital world there is nothing wrong with taking a ton of pictures, as you can just delete the ones that don’t turn out. So don’t be afraid to take loads and loads of pictures and of trying new things while doing so… at least one of them should turn out well!
Q: What kind of light umbrellas do you recommend for an amateur photographer?
A: To be honest I really don’t think you have to picky about light umbrellas. Just pick the cheapest one and you’re set to go… as long as it can reflect light (and I’m sure every light umbrella does), that’s all you need! But in order to be a tiny bit helpful, these ones here are the ones I’ve used in the past. They aren’t fancy, aren’t of great quality, but they are pretty cheap and do their job when I need them to!
Q: How do you take such amazing photos of your dogs?
A: For dog pictures, you really MUST have a dSLR or SLR. There is NO WAY you can get awesome shots of dogs without one. Why? Because they move too fast (they have no idea that bringing out a camera means stop and smile at me!) and point and shoots take forever to focus on something before you’re allowed to take the shot. Once you have a dSLR/SLR, however, the number one thing to remember is to get down ON THEIR LEVEL. I’ve seen so many shots of dogs that are taken from above. That is not their world! They’re always below you they see things from down there, so photographing from their level is very important to get those really great shots.

Q: I assume you use photoshop — did you learn it in a trial-and-error way (as I have) or do you have a good learning resource?
A: Trial and error all the way. And when I don’t know something… Google is my friend. 🙂
Q: What inspires you as a photographer?
A: This might be corny answer, but really… everything! The world, the people in it, the animals, the buildings, it all inspires me to get better and better shots to show off what I’m seeing and from the point of view I’m seeing it in. This is why whenever I leave the house I try to have my camera on me. I never know when something will happen that will give me that one perfect photograph! I also love meeting other people and photographing them… seeing the world THEY see through my camera is so very inspirational to me!








Fascinating post! Thanks so much for all the great photo tips.
Nice lesson. Now can you do another one for us dorks who only use our phones! I did buy Camera+ for the Iphone. Maybe that will help me.
Thanks for all the thought that you put into this post…I have a lot of learning to do and you gave some really helpful tips. Have to go re-shoot my stash pictures! That last photo is awesome:)
Thank you so much for the post Lina :-)) A lot of helpful tips. I have never heard of RAW setting before. Will need to read the manual to my camera better :-)) For the photographs of dark yarn or knits I found that “food” setting on my camera works well to show a right color of the black or gray yarns.
thanks so much for all of this information:) i need to find my camera booklet to see how to do change my settings. i confess, i’ve got some stash pictures up that aren’t great…but i figure i’ll re-do them when i have better lighting:) wollmeise is particularly hard to photograph! 🙂
Bless you woman for this great post! Seriously, this is the kind of info I really need — ’cause you know I am one of those blurry pictures culprits. :/
This is an awesome photography lesson 🙂 Now I need to get a better camera so that I can take better pictures of my projects. Your pictures are always on point 😉
This post is awesome!! So much information, and you’ve gone through some things that I was really confused about – for instance the direct sunlight thing. Everyone always says yarn looks better when photographed in natural light, but my experience was that direct sunlight isn’t good at all – now I know why! Thank you so much for sharing your knowledge. I really love your photos, and I’ll definitely be using some of these tips to try to take better pictures!
Great post! I still have so much to learn about settings and photoshop, but this was a nice concise few tips I could use to improve my picture taking.
Thank you so much for this fantastic post! I love the part about backgrounds playing such an important part, I’m going to try that out for sure.
Thanks for a great post. While I like to play around with a camera, photographing yarn and knitted items is always a pain. Either the colors are all wrong, or the stitches blur into a big undefined mess. So the tips you gave are bound to help a bit.
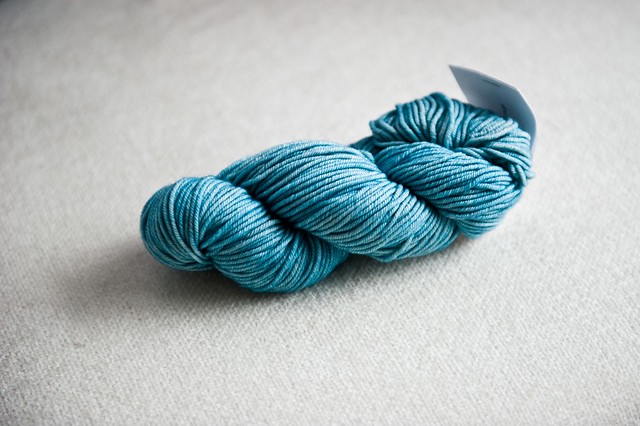
Also, that blue skein has he drooling over the monitor. Would you please share what yarn that is?
Thank you so much, I really need to get back to using my camera more and your tips are so helpful.
Thank you so much for an awesome post (and for answering my question)! I love to practice and need a lot of it to be consistent. I enjoy the learning process!
Thank you very much for these very interesting tips! They will be very useful to me!
By the way, I discovered your blog, and love reading it!
Great post!
Great tips – Makes me want a better camera. Blue yarn is currently giving me the fits to photograph.